How To Make A Pop Up Card Step By Step : Creative Ideas Diy Pixel Heart Popup Card / 10cm (w) x 14cm (h)
Dapatkan link
Facebook
X
Pinterest
Email
Aplikasi Lainnya
How To Make A Pop Up Card Step By Step : Creative Ideas Diy Pixel Heart Popup Card / 10cm (w) x 14cm (h). Now open the card and the flowers will open up. Stick the card on a red colored paper, write your message. Cut 8½x11in white smoke cardstock to create two pieces that measure 4x10½in and score one of the pieces at 5¼in and 7¾in (as shown). About press copyright contact us creators advertise developers terms privacy policy & safety how youtube works test new features press copyright contact us creators. Look for silhouette icons on internet if you want.
With the mechanism, make sure that it's pointing upwards before pushing it down onto the glue. Now open the card and the flowers will open up. Apply glue to the areas where you just marked with the mechanism. Glue the folded white section on one side of the rectangle. I was not satisfied with just having cake pop up.
Make A Pop Up Valentine S Day Card In 6 Easy Steps Dailytrib Com from www.dailytrib.com I was not satisfied with just having cake pop up. Use a ruler to find the center of the page. Then, in the similar way, you have to make all seven flowers of the pop up card. First, use the pencil and ruler to draw a line 1½ from the folded edge and parallel to it. Whether you paste it on the wall or place them on the shelf. First apply glue on center piece and stick with opposite side. Mountain folds look like the top of a mountain, and valley folds look like the bottom of a v — like a valley. Learn how to make diy pop up cards that can also be used as a decoration piece in themselves.
Place the flower shape at the center.
How to make pop up cards. With the mechanism, make sure that it's pointing upwards before pushing it down onto the glue. This pop up card is a little different than the others. Cut 8½x11in white smoke cardstock to create two pieces that measure 4x10½in and score one of the pieces at 5¼in and 7¾in (as shown). Apply glue to the areas where you just marked with the mechanism. Take one thick card stock of a4 size and fold it in half. Be careful you have to cut it in the way that the center of the paper is inwards. Look for silhouette icons on internet if you want. Open the card again and the tab should be ready to decorate. Repeat the same on other side and fold the card. Now open the card and the flowers will open up. Learn how to make diy pop up cards that can also be used as a decoration piece in themselves. First, use the pencil and ruler to draw a line 1½ from the folded edge and parallel to it.
About press copyright contact us creators advertise developers terms privacy policy & safety how youtube works test new features press copyright contact us creators. Cut out the checkerboard and mat with turquoise cardstock. You can follow the steps by pictures given in sequential order. Make a few simple cuts into a piece of decorative paper to create a tab. First apply glue on center piece and stick with opposite side.
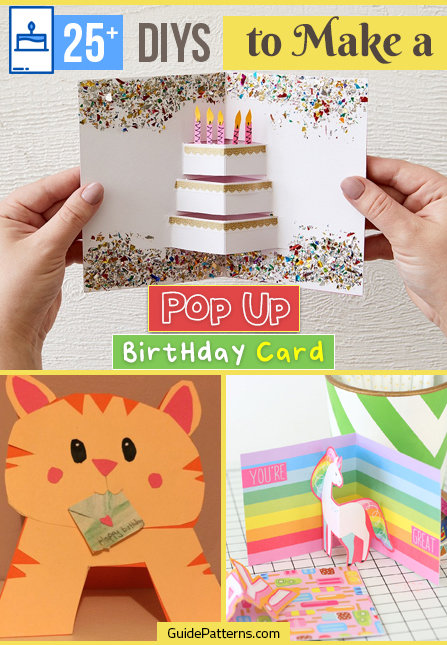
25 Diys To Make A Pop Up Birthday Card Guide Patterns from www.guidepatterns.com Then, in the similar way, you have to make all seven flowers of the pop up card. Get some colorful therapy to your dull days! Cuts don't need to be straight lines, but they must go from valley fold, across a mountain top, to the next valley fold. Now that you have made the card face and the pop up present, all you have to do is put it all together to make your birthday pop up card! Cut 8½x11in white smoke cardstock to create two pieces that measure 4x10½in and score one of the pieces at 5¼in and 7¾in (as shown). 10cm (w) x 14cm (h) Take one thick card stock of a4 size and fold it in half. Line up the mechanism with the card piece and grab a pencil.
Make lighter colored squares by stamping a second or third time without going back to the stamp pad.
How to make pop up cards. Use a ruler to find the center of the page. You can have one main tab or multiples. Cut 8½x11in white smoke cardstock to create two pieces that measure 4x10½in and score one of the pieces at 5¼in and 7¾in (as shown). Take the second sheet of yellow card stock and cut 2 rectangles, using scissors (or a craft knife) for the following dimensions: Press the card with hand for the glue to dry. Create the card base using the pop up card templates by cutting the card base in card and fold in half at the score line to create the card base. *free* shipping on qualifying offers. Take one thick card stock of a4 size and fold it in half. Cuts don't need to be straight lines, but they must go from valley fold, across a mountain top, to the next valley fold. Crease your tab (or tabs) along the centre so it's popping inwards, then fold the card closed over it. Instead of cutting slits in the construction paper, you will fold each of the pieces along the black dotted lines. With the mechanism, make sure that it's pointing upwards before pushing it down onto the glue.
Be careful you have to cut it in the way that the center of the paper is inwards. Instead of cutting slits in the construction paper, you will fold each of the pieces along the black dotted lines. First, use the pencil and ruler to draw a line 1½ from the folded edge and parallel to it. Glue the folded white section on one side of the rectangle. Learn how to make diy pop up cards that can also be used as a decoration piece in themselves.
How To Make A Pop Up Card And Pin To Win Cards Popup Card Inspirational Cards from i.pinimg.com Instead of cutting slits in the construction paper, you will fold each of the pieces along the black dotted lines. Whether you paste it on the wall or place them on the shelf. Now open the card and the flowers will open up. Open the card and fold the tabs inwards towards you. See more ideas about card tutorials, pop up cards, pop up. Make lighter colored squares by stamping a second or third time without going back to the stamp pad. I made three as the outer two are for one layer and the middle one is larger for a second layer. Be careful you have to cut it in the way that the center of the paper is inwards.
First, use the pencil and ruler to draw a line 1½ from the folded edge and parallel to it.
Instead of cutting slits in the construction paper, you will fold each of the pieces along the black dotted lines. How to make pop up cards. Cuts don't need to be straight lines, but they must go from valley fold, across a mountain top, to the next valley fold. You can follow the steps by pictures given in sequential order. Apply glue to the areas where you just marked with the mechanism. Then, in the similar way, you have to make all seven flowers of the pop up card. Glue the folded white section on one side of the rectangle. First, use the pencil and ruler to draw a line 1½ from the folded edge and parallel to it. Mountain folds look like the top of a mountain, and valley folds look like the bottom of a v — like a valley. Line up the mechanism with the card piece and grab a pencil. Whether you paste it on the wall or place them on the shelf. I was not satisfied with just having cake pop up. Take the second sheet of yellow card stock and cut 2 rectangles, using scissors (or a craft knife) for the following dimensions:
How To Make Explosion Box Handmade Birthday Card : 109 best Exploding Boxes images on Pinterest | Card boxes ... : Hope you guys liked this video. . See more ideas about explosion box, birthday explosion box, card tutorials. In this video, i am going to show you guys how to make explosion box for birthday. Diy birthday explosion box tutorial how to make cake explosion. I'm sure you gonna love this creative gift idea. Surprise your loved ones on their birthday or anniversary with this picture gift box full of pictures and memories that pops up when you take the lid off. Happy birthday explosion photo box, birthday photo box, fathers day gift, surprise memory box, pop up photo box, birthday present. Learn how to make a memory explosion box card for your boyfriend / girlfriend. Surprise your loved ones on their birthday or anniversary with this picture surprise explosion box love memory diy photo album for anniversary birthday gift;surprise explosion box love memory...
How To Make Dinosaur King Cards - Upper Deck Sports | News Article : I made and, so they aren't available to buy, and i'm not selling them.if you wan. . I loved playing this arcade game when i was a kid then i found one in a arcade that i went to i was so happy to see it and it still have out cards i played i. Hey guys, today i'm showing you how to make custom dinosaur king anime cards. See more ideas about dinosaur, dinosaur pictures, anime king. The dinosaurs that have the critical move that you are wanting to create are the ones you have to level up to get copies of the move cards. To play, since there are no sold card packs, is by downloading the pictures available here and print them. To play, since there are no sold card packs, is by downloading the pictures available here and print them. Every episode is an adventure to collect more cards and. 4.4 out of 5 stars 7. Dinosaur king is a high quality game that works in all major modern web browsers. ...
What Is The Compatibility Between Cancer And Virgo : 1 - A cancer man and virgo woman combination are a highly compatible zodiac match. . Hence, they are both caring in their own way and are drawn towards coziness in life. Virgo starts to feel secure in the caring atmosphere that's created between them. The cancer is cardinal, whereas the virgo mutable, which means the first comes with new ideas and the second moves from one thing to another, according to his or her feelings. Virgo has a sense of logic and intellect, while cancer leans on their intuitive nature, this healthy difference improves the relationship compatibility of this couple. Both the cancer and virgo crave for security and dependability in love relationship and since they both are capable of delivering these things to each other, the relationship usually go on well. Both the cancer and virgo crave for security and dependability in love relationship and since they both are capable of delivering the...


Komentar
Posting Komentar